
升级OPENSSH 遇到头疼的问题
Openssh 爆出很多安全漏洞,客户那边搞安全检查,扫描结果出来了,漏洞基本都是在openssh上面 于是打算升级
升级过程很顺利
具体情况这里http://pkgs.org/centos-6/ghettoforge-testing-x86_64/openssh-6.6.1p1-4.gf.el6.x86_64.rpm.html
备份原有源
cd /etc/yum.repos.d/
mv rhel-source.repo rhel-source.repo.bak
mv packagekit-media.repo packagekit-media.repo.bak
配置源
vi CentOS-Base.repo
[base]
name=CentOS-$releasever - Base - mirrors.aliyun.com
failovermethod=priority
baseurl=http://mirrors.aliyun.com/centos/6.7/os/$basearch/
http://mirrors.aliyuncs.com/centos/6.7/os/$basearch/
#mirrorlist=http://mirrorlist.centos.org/?release=$releasever&arch=$basearch&repo=os
gpgcheck=1
gpgkey=http://mirrors.aliyun.com/centos/RPM-GPG-KEY-CentOS-6
#released updates
[updates]
name=CentOS-$releasever - Updates - mirrors.aliyun.com
failovermethod=priority
baseurl=http://mirrors.aliyun.com/centos/6.7/updates/$basearch/
http://mirrors.aliyuncs.com/centos/6.7/updates/$basearch/
#mirrorlist=http://mirrorlist.centos.org/?release=$releasever&arch=$basearch&repo=updates
gpgcheck=1
gpgkey=http://mirrors.aliyun.com/centos/RPM-GPG-KEY-CentOS-6
#additional packages that may be useful
[extras]
name=CentOS-$releasever - Extras - mirrors.aliyun.com
failovermethod=priority
baseurl=http://mirrors.aliyun.com/centos/6.7/extras/$basearch/
http://mirrors.aliyuncs.com/centos/$releasever/extras/$basearch/
#mirrorlist=http://mirrorlist.centos.org/?release=$releasever&arch=$basearch&repo=extras
gpgcheck=1
gpgkey=http://mirrors.aliyun.com/centos/RPM-GPG-KEY-CentOS-6
#additional packages that extend functionality of existing packages
[centosplus]
name=CentOS-$releasever - Plus - mirrors.aliyun.com
failovermethod=priority
baseurl=http://mirrors.aliyun.com/centos/6.7/centosplus/$basearch/
http://mirrors.aliyuncs.com/centos/6.7/centosplus/$basearch/
#mirrorlist=http://mirrorlist.centos.org/?release=$releasever&arch=$basearch&repo=centosplus
gpgcheck=1
enabled=0
gpgkey=http://mirrors.aliyun.com/centos/RPM-GPG-KEY-CentOS-6
#contrib - packages by Centos Users
[contrib]
name=CentOS-$releasever - Contrib - mirrors.aliyun.com
failovermethod=priority
baseurl=http://mirrors.aliyun.com/centos/6.7/contrib/$basearch/
http://mirrors.aliyuncs.com/centos/6.7/contrib/$basearch/
#mirrorlist=http://mirrorlist.centos.org/?release=$releasever&arch=$basearch&repo=contrib
gpgcheck=1
enabled=0
gpgkey=http://mirrors.aliyun.com/centos/RPM-GPG-KEY-CentOS-6
[gf-test]
baseurl=http://mirror.symnds.com/distributions/gf/el/6/testing/x86_64/
gpgcheck=0
enabled=1
更新缓存
yum clean
yum makecache
先安装telnet 以防止更新openssh的时候 终端断开。
yum install telnet
详细配置请看
http://jingyan.baidu.com/article/9f63fb91ac7ebcc8400f0e94.html
配置完成后 使用telnet 登录到服务器
开始更新openssh
yum update openssl
yum update openssh
重启服务
service sshd restart
使用ssh –V 查看更新成功没有

接下来就是噩梦的开始
升级好了之后,使用客户端怎么都登录不上去
一开始以为是配置文件的问题,把另外一台没升级过的配置文件sshd_config拷贝到本机,不行
寄出百度 http://bbs.51cto.com/thread-1098820-1.html
按照这个说法
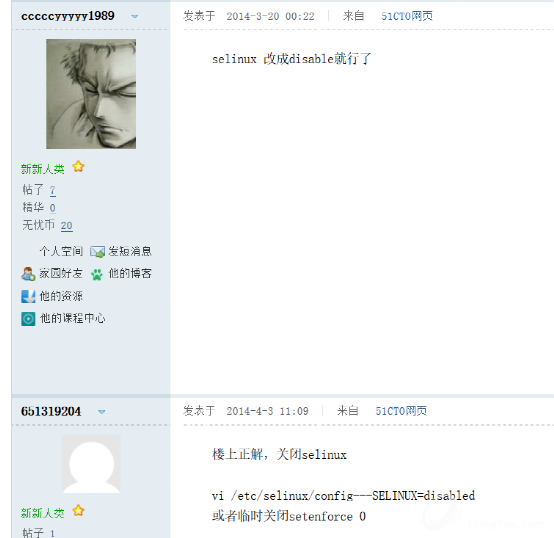
修改配置文件后,发现还是不行,于是重启服务器,居然报错,起不来
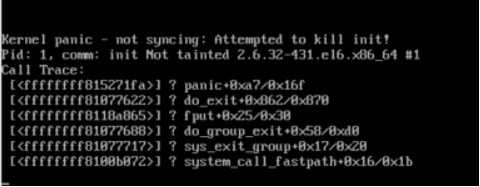
妹的一个问题没有解决又来一个问题
按照http://jingyan.baidu.com/article/e9fb46e19c73167521f76681.html
所说的方法照做,进去后把参数修改回来,重启正常了,SSH 无法登陆的问题还是没有解决
又有说是算法的问题
http://bbs.51cto.com/thread-1176918-1.html
照做还是不行, 于是陷入了无休止的找资料之中
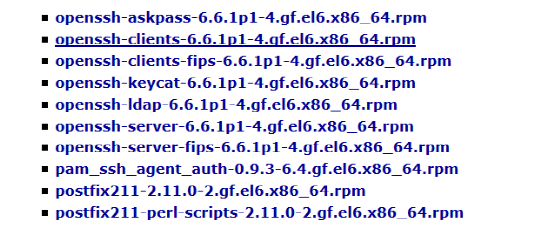
回过头来在来看
http://pkgs.org/centos-6/ghettoforge-testing-x86_64/openssh-6.6.1p1-4.gf.el6.x86_64.rpm.html
发现有关于pam的包,会不会是和这个有问题,果断安装,结果还是不行。
似乎陷入死循环了。
就在要暴走的情况下找到了这篇文章
http://bbs.csdn.net/topics/391893954?page=1
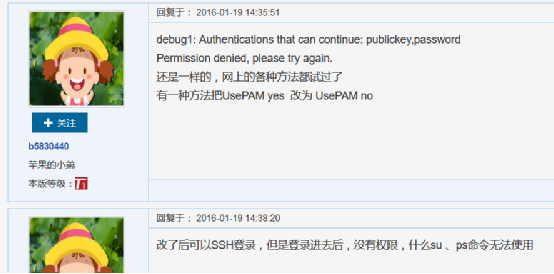
修改 UserPAM no 重启服务登录成功,但是服务端会有个警告报错
看来问题就是处在PAM上面
对比两台机器的/etc/pam.d/sshd文件 果真发现问题,修改成一样,UserPAM 改回成yes

问题还有后续,发现另外一台机器升级之后,安装上面的方法root用户可以登录,普通用户不能登录。回想起来,把原始OPENSSH5.3的配置文件覆盖到本机的配置文件 sshd_config . 覆盖完成,登录正常
以下是配置文件的内容,以免忘记,先拷贝出来吧
# $OpenBSD: sshd_config,v 1.93 2014/01/10 05:59:19 djm Exp $
# This is the sshd server system-wide configuration file. See
# sshd_config(5) for more information.
# This sshd was compiled with PATH=/usr/local/bin:/bin:/usr/bin
# The strategy used for options in the default sshd_config shipped with
# OpenSSH is to specify options with their default value where
# possible, but leave them commented. Uncommented options override the
# default value.
# If you want to change the port on a SELinux system, you have to tell
# SELinux about this change.
# semanage port -a -t ssh_port_t -p tcp #PORTNUMBER
#
#Port 22
#AddressFamily any
#ListenAddress 0.0.0.0
#ListenAddress ::
# The default requires explicit activation of protocol 1
#Protocol 2
# HostKey for protocol version 1
#HostKey /etc/ssh/ssh_host_key
# HostKeys for protocol version 2
HostKey /etc/ssh/ssh_host_rsa_key
#HostKey /etc/ssh/ssh_host_dsa_key
HostKey /etc/ssh/ssh_host_ecdsa_key
HostKey /etc/ssh/ssh_host_ed25519_key
# Lifetime and size of ephemeral version 1 server key
#KeyRegenerationInterval 1h
#ServerKeyBits 1024
# Ciphers and keying
#RekeyLimit default none
# Logging
# obsoletes QuietMode and FascistLogging
#SyslogFacility AUTH
SyslogFacility AUTHPRIV
#LogLevel INFO
# Authentication:
#LoginGraceTime 2m
#PermitRootLogin yes
PermitRootLogin yes
#StrictModes yes
#MaxAuthTries 6
#MaxSessions 10
#RSAAuthentication yes
#PubkeyAuthentication yes
# The default is to check both .ssh/authorized_keys and .ssh/authorized_keys2
# but this is overridden so installations will only check .ssh/authorized_keys
#AuthorizedKeysFile .ssh/authorized_keys
AuthorizedKeysFile /etc/ssh/authorized_keys
#AuthorizedPrincipalsFile none
#AuthorizedKeysCommand none
#AuthorizedKeysCommandUser nobody
# For this to work you will also need host keys in /etc/ssh/ssh_known_hosts
#RhostsRSAAuthentication no
# similar for protocol version 2
#HostbasedAuthentication no
# Change to yes if you don't trust ~/.ssh/known_hosts for
# RhostsRSAAuthentication and HostbasedAuthentication
#IgnoreUserKnownHosts no
# Don't read the user's ~/.rhosts and ~/.shosts files
#IgnoreRhosts yes
# To disable tunneled clear text passwords, change to no here!
#PasswordAuthentication yes
#PermitEmptyPasswords no
PasswordAuthentication yes
# Change to no to disable s/key passwords
#ChallengeResponseAuthentication yes
ChallengeResponseAuthentication no
# Kerberos options
#KerberosAuthentication no
#KerberosOrLocalPasswd yes
#KerberosTicketCleanup yes
#KerberosGetAFSToken no
#KerberosUseKuserok no
# GSSAPI options
#GSSAPIAuthentication yes
#GSSAPICleanupCredentials no
#GSSAPIStrictAcceptorCheck yes
#GSSAPIKeyExchange no
# Set this to 'yes' to enable PAM authentication, account processing,
# and session processing. If this is enabled, PAM authentication will
# be allowed through the ChallengeResponseAuthentication and
# PasswordAuthentication. Depending on your PAM configuration,
# PAM authentication via ChallengeResponseAuthentication may bypass
# the setting of "PermitRootLogin without-password".
# If you just want the PAM account and session checks to run without
# PAM authentication, then enable this but set PasswordAuthentication
# and ChallengeResponseAuthentication to 'no'.
# WARNING: 'UsePAM no' is not supported in Fedora and may cause several
# problems.
# UsePAM no
#AllowAgentForwarding yes
#AllowTcpForwarding yes
#GatewayPorts no
X11Forwarding yes
#X11DisplayOffset 10
#X11UseLocalhost yes
#PermitTTY yes
#PrintMotd yes
#PrintLastLog yes
"/etc/ssh/sshd_config" 166L, 4493C written
 有C++难题,加我!